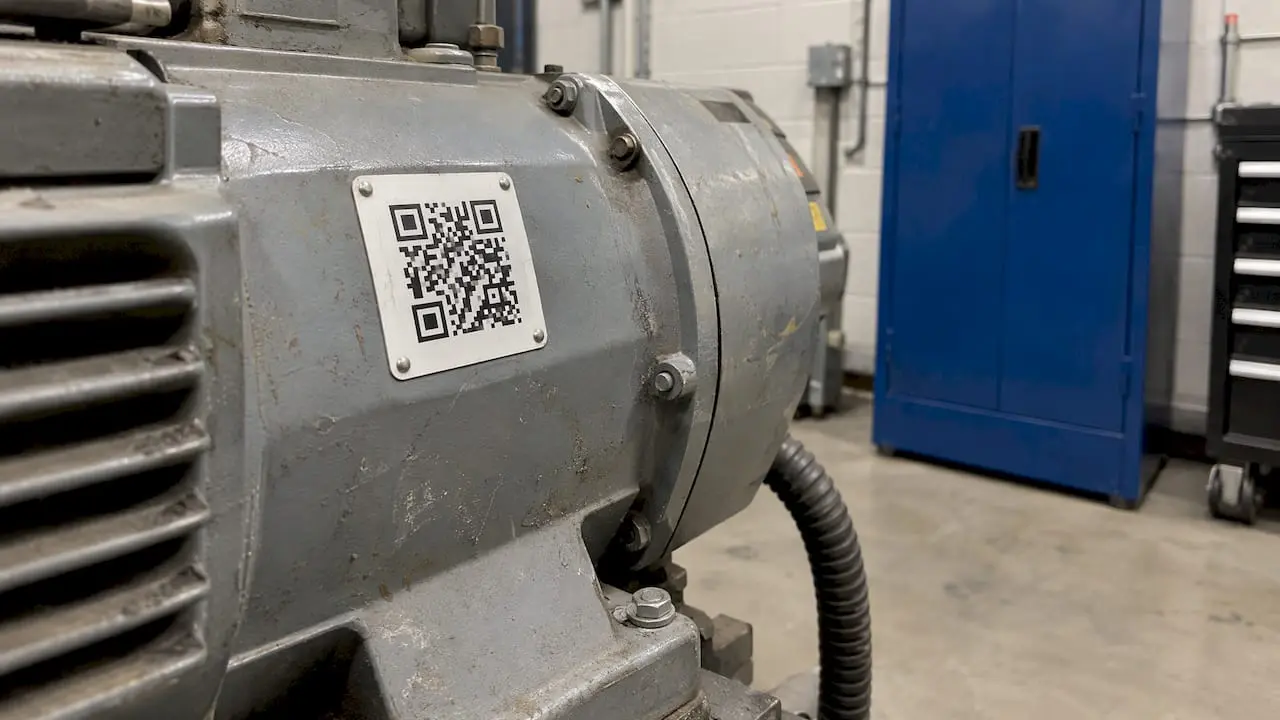
A QR code asset label works when the code carries only a permanent asset ID, the material survives the harshest condition the asset faces, and the code opens a live record in your maintenance system. Get those three things right and a technician can scan a pump, see its history and open a work order in seconds. Get one wrong and the label fades, points to stale data or turns into an orphaned tag. In MPulse CMMS, barcode scanning and mobile access are built to tie the label to the asset record, so the tag stays a simple key to the full history.
This guide is for facility managers, maintenance supervisors and operations teams who are labeling equipment for the first time or fixing a program that has drifted. It covers what goes on the label, how to choose material and print method, how to print and test, and how to keep the program accurate over time.
TL;DR
- Encode a stable, opaque asset ID in the QR code, not changing details like location or owner. The CMMS record holds everything else.
- Match the label material to the harshest condition the asset will face. Polyester with a resin ribbon is the common durable choice for industrial use.
- Test every label design on at least two devices before a large print run, and keep the code large, high-contrast and surrounded by clear space.
- Tag new assets within a set window and replace damaged tags quickly, or a program can degrade within 12 to 18 months.
- Connect the label to a CMMS record so scans open history, procedures and work orders.
Table of Contents
- What a QR code asset label actually does
- What belongs on the label, and what the code should link to
- Choose the label material before the code format
- Printing: method, settings and testing
- How technicians use the scan
- Keep the program accurate after launch
- Compliance and regulated environments
- A rollout plan you can follow
- Our perspective
- Put labels to work in MPulse
- FAQ
- Sources
What a QR code asset label actually does
An asset label is a physical identifier fixed to a piece of equipment. The QR code on it is a two-dimensional barcode that any smartphone camera can read, so you do not need a dedicated scanner for every technician. A QR code also holds far more data than a standard one-dimensional barcode: up to 4,296 alphanumeric characters versus roughly 40.
In maintenance, the point is not the data on the label. The point is what the scan opens. Scanning the code should take a technician to the asset’s record: manuals, parts lists, inspection history and service notes, along with any open work orders. Facilities that put a unique code on each piece of equipment can give teams faster access to this information, which is how labels shorten the time from “something is wrong” to “here is what we do.”
That is also why the label and the maintenance system should be planned together. A label without a record behind it is only a sticker with a number.
What belongs on the label, and what the code should link to
Put identity on the label, not details
The most durable rule in asset tagging is simple: the label carries the identity and the database carries the details. A tag is physical and permanent, while location, custodian, department and service dates change constantly. Guidance on label layout is consistent that fields which change over time should stay off the tag, because the code should open a record where those details can be updated without reprinting anything.
A practical label includes:
- Your organization’s name or logo
- The unique asset ID in human-readable text
- The QR code (and a linear barcode if some of your scanners need one)
- A return phone number or contact for found or misplaced equipment
The human-readable ID matters. When a code is scratched or a phone battery is dead, a technician can still read the number and look the asset up by hand.
Encode an opaque ID
Encode a stable, unique identifier, not the asset’s name, owner, location or value. Those attributes change, and a printed tag cannot. There are three common patterns for what the code contains: a bare asset number, a URL any phone camera opens without an app, or a URL with a redirect layer that lets a tag be reassigned.
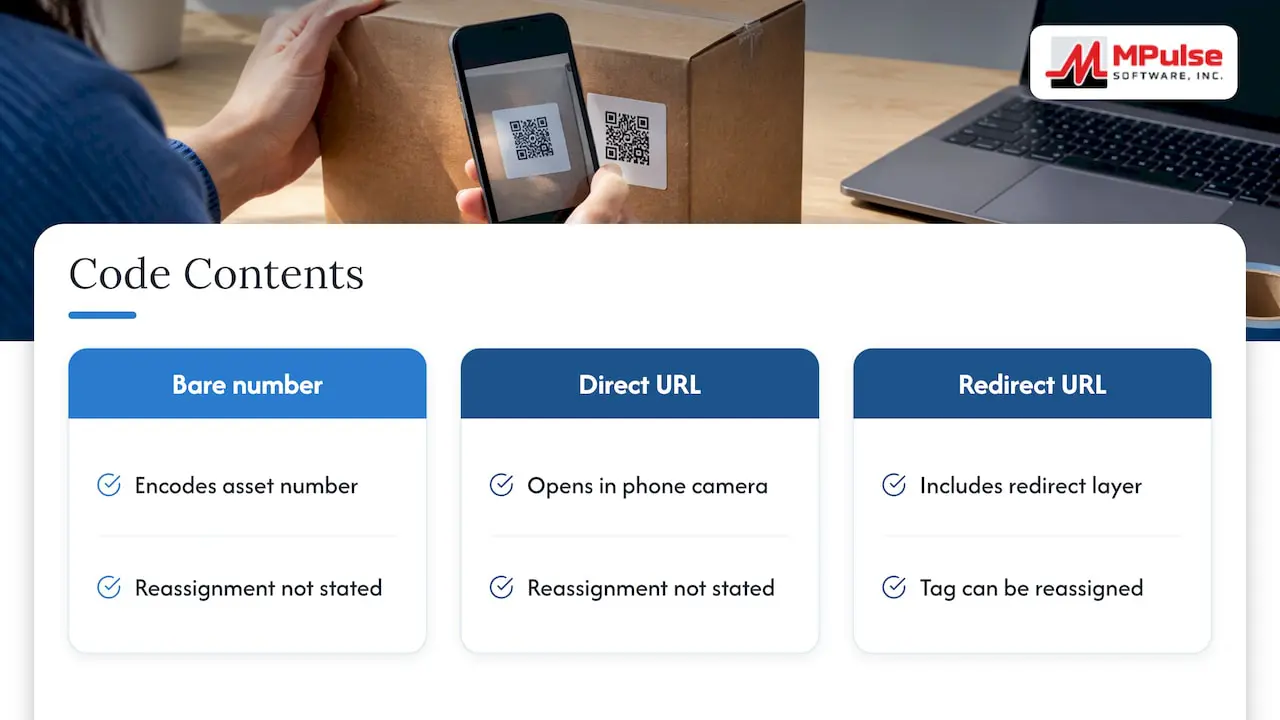
If you use a URL, keep it short. A short path on a short domain scans from further away and at worse angles than a long path with query parameters at the same label size. Long strings force a denser code, and a denser code is harder to read on a greasy or curved surface.
What the record should hold
The record behind the scan is where the detail lives. Typical fields include asset name and model, serial number, purchase date and warranty expiry, assigned department, current location, last maintenance date, next scheduled service, condition status and a link to the manual. Most businesses track this set of fields and let the code point to the record. If you are building these records for the first time, our guide to creating CMMS asset records walks through the setup.
Choose the label material before the code format
Most failed tagging programs fail on the label, not the code. The substrate, not the barcode printed on it, determines whether an identifier is still readable after five years of heat, chemicals, wash-downs or UV. Start by identifying the environment, the surface the label will stick to, any compliance standard, and the service life you need.
Match the material to the environment
| Environment | Common material choice |
|---|---|
| Office and indoor, low contact | Polyester or vinyl labels |
| Warehouse | Polycarbonate |
| Outdoor, UV, chemical or wash-down | Anodized aluminum etched tags |
| High heat above 400°F | Stainless steel etched tags |
| Outdoor and high heat | Ceramic |
These pairings come from a published asset tagging guide. Paper or plastic labels may suit low-contact indoor assets, but they degrade quickly outdoors or in harsh conditions.
For most industrial work, polyester face stock, a resin thermal transfer ribbon and a clear overlaminate deliver the longest reliable life. Polyester laminate labels are the default for most B2B tracking programs, handling temperatures from -40°F to 200°F, light chemical exposure, abrasion and UV, at roughly $0.05 to $0.20 per label depending on format and quantity.
Special conditions
- Dusty areas: matte white or block-out white vinyl is recommended.
- High temperature: 2 mil polyester or a high-tack adhesive withstands up to 302°F.
- Chemical exposure: polyester.
- Low-surface-energy plastics: a high-grip adhesive.
- Curved surfaces: convex vinyl in the 4 to 6 mil range.
- High visibility: fluorescent or reflective vinyl.
These recommendations come from an equipment labeling guide. Match the adhesive to the surface before you specify labels. The physical tag is half the system, and adhesive and size choices decide whether a program survives its first six months in production.
For a deeper look at why tags separate from their records over time, read our piece on 3 to 5 year barcode label durability for CMMS.
Printing: method, settings and testing
Pick the print method
The face stock and topcoat must match the print method. Thermal transfer printing uses a ribbon to transfer wax, wax/resin or resin onto the label under heat, and resin ribbons produce the most durable image. They are required for chemical, outdoor and high-temperature applications.
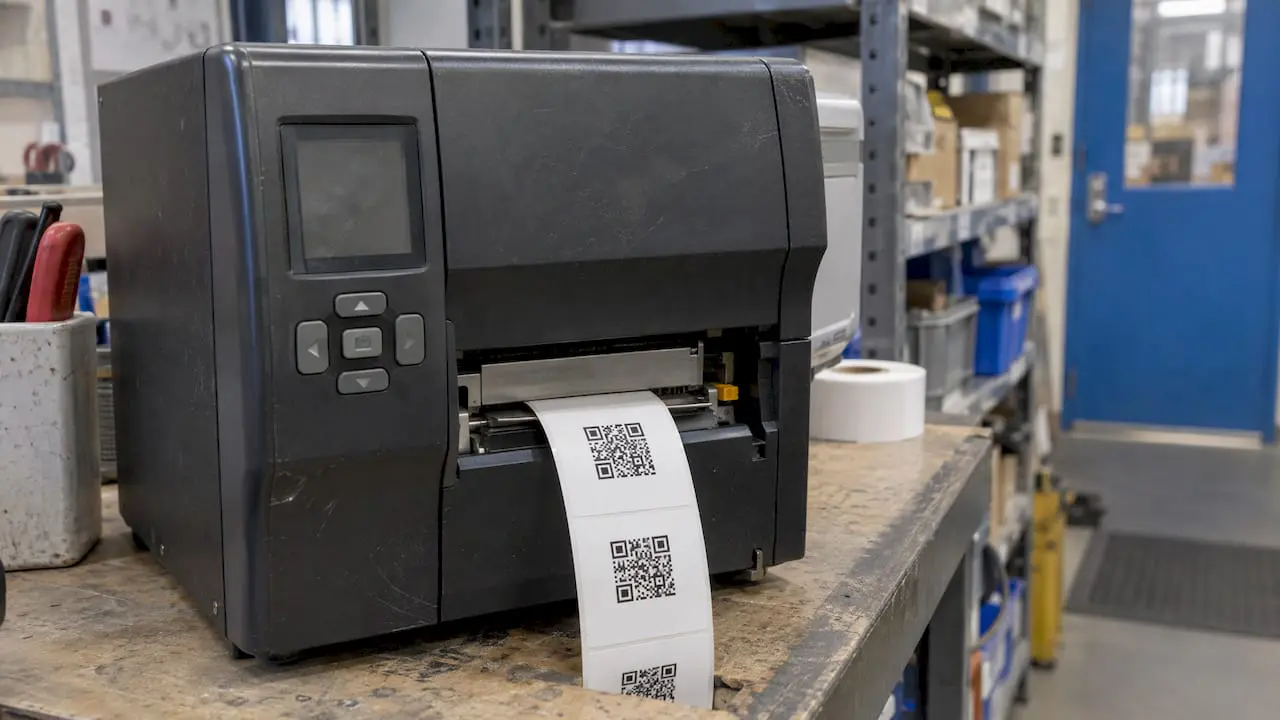
Direct thermal labels are cheaper at the start but fade. They can lose legibility within 12 to 18 months under light and heat, so for tags meant to last 5 to 10 years, thermal transfer with a resin ribbon on polyester is the dependable route. The same source suggests printing polyester labels at 4 inches per second or slower and using 300 DPI for labels smaller than 1 inch.
Make the code scannable
Three things decide whether a code scans in the field: the physical size of the code area, the clear margin around it, and contrast against the label face. A dark code on a light background is what readers expect.
In practice:
- Size the code for the scanning distance. A tag on a ceiling-mounted unit needs a larger code than one on a handheld tool.
- Leave a clear margin around the code. Do not let borders, logos or text crowd it.
- Keep contrast high. Avoid colored or glossy backgrounds that reflect light.
- Keep label size, font and placement consistent across assets so technicians know where to look. Consistency speeds scanning and reduces errors, and only the critical fields should appear.
Test before a big run
Print a test label and scan it with at least two different devices before committing to a large order. Try it from your real scanning distance, on the real surface, in the real lighting. A code that reads perfectly on your desk can fail on a curved, oily housing in a dim mechanical room.
If you are searching for how to handle barcode label printing for maintenance at volume, the same logic holds: settle the ID scheme and the material first, run a pilot of a few dozen labels on actual equipment, and only then order in bulk. For programs above 10,000 tags, generating codes through an API in the label-design workflow is worth considering.
How technicians use the scan
The label pays off when scanning changes what a technician does next. With a unique code on each asset, scanning supports preventive maintenance by letting technicians open procedures, review past inspection records onsite, record updates and service notes, and keep work consistent across technicians and shifts.
A typical flow looks like this:
- The technician arrives at the asset and scans the label with a phone or tablet.
- The asset record opens with its history, manuals and open work orders.
- The technician follows the scheduled task or inspection checklist.
- Notes, parts used and time are recorded against the same asset.
- The next due date updates in the schedule.
MPulse supports mobile devices and barcode scanning, so that last-mile step of finding the right asset and recording the work happens at the equipment, not later at a desk. Teams that want other people in the building to report problems can also use codes for requests. We cover that in setting up QR code maintenance requests, and MPulse offers unlimited free requesters.
Barcode, QR or something else
QR codes suit most facilities because phones read them. Linear barcodes remain useful where dedicated scanners are already in place, and RFID fits specific cases such as high volumes of tagged items read without line of sight. Our barcode, RFID or both decision framework lays out when each makes sense for maintenance.
Keep the program accurate after launch
The first printing is the easy part. Without ongoing upkeep, a tagging program can degrade within 12 to 18 months. The same guidance suggests a simple protocol:
- Tag new acquisitions within a defined window, such as five business days from receipt.
- Document disposals so retired assets do not linger in the system.
- Re-scan tags when assets move between locations.
- Have technicians report damaged or missing tags through the maintenance system.
- Keep spare tags in the maintenance store and replace a damaged one within 24 hours of identification.
- Verify the asset record whenever a tag is replaced.
Build these into routine work. A damaged label found during a scheduled inspection should become a task, not a note on a clipboard.
Plan for the tag to outlive the software
A tag will usually outlive any one system. That is why an opaque ID, ideally wrapped in a URL on a domain you control, is the safer encoding: you can avoid deep links into one tool that may break when systems migrate. Keep the printed string short and stable, and the labels stay useful for years.
Compliance and regulated environments
Healthcare facilities, schools and manufacturers with audit requirements need to show what was done, when and by whom. A scan that logs work against the right asset creates that trail as a by-product of the job. Our guides on healthcare asset tracking practices and on tracking asset history for compliance show how labels, records and inspection checklists fit together for audit readiness.
A rollout plan you can follow
- Define the ID scheme. Choose a short, unique, meaningless-by-design number format and decide who issues IDs.
- Survey the environments. List the harshest condition for each asset group: heat, chemicals, wash-down, outdoor exposure, curved surfaces.
- Pick materials and print method. Polyester with resin thermal transfer is the usual starting point for industrial assets.
- Build the records first. Create the asset record before the label is applied so the first scan opens something useful.
- Pilot. Print a small batch, apply it on real equipment and scan with two devices.
- Roll out by area. Tag one building, line or floor at a time and check records as you go.
- Set the replacement routine. Spare tags in the store, a 24-hour replacement target and a five-day window for new assets.
Our perspective
Most labeling projects we see discussed start with the label and end with a spreadsheet. We think the order should be reversed. The record is the asset’s real identity: its history, its schedule, its parts and its procedures. The label is the shortest path to that record.
That is why we advise keeping the code to a simple ID and letting the CMMS carry the detail. When a technician scans an asset in MPulse, the goal is that they land on the work that matters, a preventive maintenance task or an open work order, without searching. Our calendar interface, barcode scanning and mobile compatibility are designed for exactly that moment at the equipment.
More than 3,500 customers use MPulse to organize maintenance, and our customers report efficiency improvements of up to 40%. Labels are a small part of that, but they are the part every technician touches every day, so they are worth getting right.
Mark
Put labels to work in MPulse
MPulse CMMS ties scanned assets to preventive maintenance schedules, work orders, inventory and reporting. Plans are published at $29 per month per user for Professional and $79 per month per user for Advanced, and a Technician License is available for field staff. Our implementation services and training help teams set up asset records and workflows before the first label goes on a machine. See MPulse pricing or our implementation and training services.
FAQ
What should a QR code asset label link to?
It should open the asset’s record in your maintenance system, not a static page. That record holds manuals, history, schedules and open work orders. Encoding only a stable ID means the details can change without reprinting the label.
What is the best material for asset labels?
It depends on the environment. Polyester with a resin thermal transfer ribbon and clear overlaminate is the common choice for industrial assets. Anodized aluminum suits outdoor or wash-down use, and stainless steel suits heat above 400°F.
How long do QR code asset labels last?
Material and print method decide it. Direct thermal labels can fade within 12 to 18 months, while thermal transfer on polyester is intended for 5 to 10 years. Even durable labels need a replacement routine for damaged tags.
How big should the code be?
Size it for the scanning distance, with a clear margin around it and strong contrast against the background. Test on at least two devices at your actual working distance before ordering a large batch.
Do I need a CMMS to use QR code asset labels?
A label only identifies an asset. The value comes from the record it opens, with schedules, work orders and history behind it. A CMMS such as MPulse keeps the label, the record and the maintenance work connected.
Sources
- Asset Tagging: Barcode vs RFID vs QR Code Systems
- Asset Label Template | QR Tag Layout Guide
- QR Barcode Labels: How to Specify Custom QR Asset Tags
- QR Code Asset Tags: The Best Guide for 2026
- Industrial Label Materials Guide
- Equipment Labels That Cut Downtime and Boost Accuracy
- Tagging & Tracking Checklist
- QR Code Asset Tags: Materials, Sizing, and Ordering Guide
- How to Label Equipment for Asset Tracking
- QR Code Equipment and Assets Management
- QR codes for asset tagging